Kubernetes Letschat
Introduccion
Kubernetes se ha convertido en el estándar para la orquestación de contenedores. Si bien herramientas como Docker permiten ejecutar contenedores fácilmente, cuando tienes decenas (o cientos) de aplicaciones desplegadas, mantenerlas disponibles, escalarlas y actualizarlas manualmente se vuelve un reto.
Ahí es donde entra Kubernetes (K8s): una plataforma de código abierto diseñada para automatizar el despliegue, escalado y gestión de aplicaciones en contenedores.
En este post aprenderás los conceptos básicos de Kubernetes y montarás un pequeño clúster local con tres máquinas virtuales usando Vagrant y Ansible, sobre el que desplegarás tu primera aplicación: Let’s Chat, una app de mensajería autohospedada.
¿Qué es Kubernetes?
Kubernetes coordina contenedores en múltiples máquinas, gestionando su disponibilidad, escalado y comunicación.
Para entenderlo mejor, veamos sus elementos fundamentales:
| Concepto | Descripción |
|---|---|
| Clúster | Conjunto de máquinas (nodos) que actúan como un único sistema. |
| Nodo maestro (Control Plane) | Gestiona el estado del clúster, planifica los pods y responde a los comandos kubectl. |
| Nodos de trabajo (Workers) | Ejecutan las cargas de trabajo, es decir, los contenedores (pods). |
| Pod | Unidad mínima de ejecución en Kubernetes; puede contener uno o varios contenedores. |
| Deployment | Define cuántos pods debe haber y cómo deben actualizarse. |
| Service | Expone los pods dentro o fuera del clúster para que sean accesibles. |
En resumen: tú defines el estado deseado (por ejemplo, “quiero 3 copias de mi aplicación web”), y Kubernetes se encarga de mantenerlo automáticamente.
Requisitos previos
- Equipo con al menos 8 GB de RAM.
- Tener instalados Vagrant, VirtualBox y Ansible.
- Conocimientos básicos de Linux y SSH.
Preparacion del escenario
Empezamos creando en nuestro equipo un directorio donde almacenaremos nuestro escenario vagrant. Dicho escenario sera el siguiente:
# -*- mode: ruby -*-
# vi: set ft=ruby :

IMAGE_NAME = "bento/ubuntu-16.04"
N = 2

Vagrant.configure("2") do |config|
    config.ssh.insert_key = false

    config.vm.provider "virtualbox" do |v|
        v.memory = 2048
        v.cpus = 2
    end

    config.vm.define "k8s-master" do |master|
        master.vm.box = IMAGE_NAME
        master.vm.network "private_network", ip: "192.168.50.10"
        master.vm.hostname = "k8s-master"
        master.vm.provision "ansible" do |ansible|
            ansible.playbook = "kubernetes-setup/master-playbook.yml"
            ansible.extra_vars = {
                node_ip: "192.168.50.10",
            }
        end
    end

    (1..N).each do |i|
        config.vm.define "node-#{i}" do |node|
            node.vm.box = IMAGE_NAME
            node.vm.network "private_network", ip: "192.168.50.#{i + 10}"
            node.vm.hostname = "node-#{i}"
            node.vm.provision "ansible" do |ansible|
                ansible.playbook = "kubernetes-setup/node-playbook.yml"
                ansible.extra_vars = {
                    node_ip: "192.168.50.#{i + 10}",
                }
            end
        end
    end
end
Con este escenario desplegaremos 3 maquinas, una maquina master en la que se instalara ansible y ejecutara el playbook que pondremos, y 2 nodos en los que se ejecutara ansible también pero con un playbook distinto.
Para que el despliegue mas adelante funcione, sera necesario tener instalado en la maquina anfitriona ansible, en mi caso la version 2.7.7, ya que es el ansible de la maquina anfitriona el que se instalara posteriormente en las maquinas de nuestro escenario.
Los dos playbooks los crearemos en un directorio dentro de nuestro directorio de kubernetes con el siguiente contenido:
master-playbook.yaml:
- hosts: all
  become: true
  tasks:
  - name: Instala los paquetes que permite usar APT con HTTPS
    apt:
      name: ""
      state: present
      update_cache: yes
    vars:
      packages:
      - apt-transport-https
      - ca-certificates
      - curl
      - gnupg-agent
      - software-properties-common

  - name: Añade la clave apt para Docker
    apt_key:
      url: https://download.docker.com/linux/ubuntu/gpg
      state: present

  - name: Añade el repositorio apt de la versión estable
    apt_repository:
      repo: deb [arch=amd64] https://download.docker.com/linux/ubuntu xenial stable
      state: present

  - name: Instala Docker y sus dependencias
    apt:
      name: ""
      state: present
      update_cache: yes
    vars:
      packages:
      - docker-ce
      - docker-ce-cli
      - containerd.io
    notify:
      - docker status

  - name: Añade al usuario vagrant al grupo de docker
    user:
      name: vagrant
      group: docker

  - name: Elimina el fichero swap de /etc/fstab
    mount:
      name: ""
      fstype: swap
      state: absent
    with_items:
      - swap
      - none

  - name: Deshabilita el swap
    command: swapoff -a
    when: ansible_swaptotal_mb > 0

  - name: Añade la clave apt para Kubernetes
    apt_key:
      url: https://packages.cloud.google.com/apt/doc/apt-key.gpg
      state: present

  - name: Añade el repositorio apt para Kubernetes
    apt_repository:
      repo: deb https://apt.kubernetes.io/ kubernetes-xenial main
      state: present
      filename: kubernetes.list

  - name: Instala los binarios de Kubernetes
    apt:
      name: ""
      state: present
      update_cache: yes
    vars:
      packages:
        - kubelet
        - kubeadm
        - kubectl

  - name: Configura el node ip
    lineinfile:
      path: /etc/default/kubelet
      line: KUBELET_EXTRA_ARGS=--node-ip=
      create: yes

  - name: Reinicia kubelet
    service:
      name: kubelet
      daemon_reload: yes
      state: restarted

  - name: Reinicia Docker
    systemd:
     name: docker
     state: restarted

  - name: Inicializa el cluster de Kubernetes usando kubeadm
    command: kubeadm init --apiserver-advertise-address="192.168.50.10" --apiserver-cert-extra-sans="192.168.50.10" --pod-network-cidr=192.168.0.0/16 --node-name k8s-master

  - name: Organiza el kubeconfig del usuario vagrant
    command: ""
    with_items:
     - mkdir -p /home/vagrant/.kube
     - cp -i /etc/kubernetes/admin.conf /home/vagrant/.kube/config
     - chown vagrant:vagrant /home/vagrant/.kube/config

  - name: Instala el pod de red Calico
    become: false
    command: kubectl create -f https://docs.projectcalico.org/manifests/tigera-operator.yaml

  - name: Instala el pod de red Calico 2
    become: false
    command: kubectl create -f https://docs.projectcalico.org/manifests/custom-resources.yaml

  - name: Genera el comando de join
    command: kubeadm token create --print-join-command
    register: join_command


  - name: Copia el comando de join a un fichero local
    become: false
    local_action: copy content="" dest="./join-command"

  handlers:
    - name: docker status
      service: name=docker state=started
node-playbook.yaml:
- hosts: all
  become: true
  tasks:
  - name: Instala los paquetes que permite usar APT con HTTPS
    apt:
      name: ""
      state: present
      update_cache: yes
    vars:
      packages:
      - apt-transport-https
      - ca-certificates
      - curl
      - gnupg-agent
      - software-properties-common

  - name: Añade la clave apt para Docker
    apt_key:
      url: https://download.docker.com/linux/ubuntu/gpg
      state: present

  - name: Añade el repositorio apt de la versión estable
    apt_repository:
      repo: deb [arch=amd64] https://download.docker.com/linux/ubuntu xenial stable
      state: present

  - name: Instala Docker y sus dependencias
    apt:
      name: ""
      state: present
      update_cache: yes
    vars:
      packages:
      - docker-ce
      - docker-ce-cli
      - containerd.io
    notify:
      - docker status

  - name: Añade al usuario vagrant al grupo de Docker
    user:
      name: vagrant
      group: docker

  - name: Elimina el fichero de swap de /etc/fstab
    mount:
      name: ""
      fstype: swap
      state: absent
    with_items:
      - swap
      - none

  - name: Deshabilita el swap
    command: swapoff -a
    when: ansible_swaptotal_mb > 0

  - name: Añade la clave apt para Kubernetes
    apt_key:
      url: https://packages.cloud.google.com/apt/doc/apt-key.gpg
      state: present

  - name: Añade el repositorio apt para Kubernetes
    apt_repository:
      repo: deb https://apt.kubernetes.io/ kubernetes-xenial main
      state: present
      filename: kubernetes.list

  - name: Instala los binarios para Kubernetes
    apt:
      name: ""
      state: present
      update_cache: yes
    vars:
      packages:
        - kubelet
        - kubeadm
        - kubectl

  - name: Configura node ip
    lineinfile:
      path: /etc/default/kubelet
      line: KUBELET_EXTRA_ARGS=--node-ip=
      create: yes

  - name: Reinicia kubelet
    service:
      name: kubelet
      daemon_reload: yes
      state: restarted

  - name: Reinicia Docker
    systemd:
     name: docker
     state: restarted

  - name: Copia el comando de join a la localización del server
    copy: src=join-command dest=/tmp/join-command.sh mode=0777

  - name: Une el nodo al clúster
    command: sh /tmp/join-command.sh

  handlers:
    - name: docker status
      service: name=docker state=started
Levantamos el escenario:
sergioib@debian-sergio:~/Escritorio/Informatica/Vagrant/k8$ vagrant up
Bringing machine 'k8s-master' up with 'virtualbox' provider...
Bringing machine 'node-1' up with 'virtualbox' provider...
Bringing machine 'node-2' up with 'virtualbox' provider...
==> k8s-master: Importing base box 'bento/ubuntu-16.04'...
==> k8s-master: Matching MAC address for NAT networking...
==> k8s-master: Checking if box 'bento/ubuntu-16.04' version '202102.02.0' is up to date...
==> k8s-master: Setting the name of the VM: k8_k8s-master_1615035261709_29283
==> k8s-master: Clearing any previously set network interfaces...
==> k8s-master: Preparing network interfaces based on configuration...
    k8s-master: Adapter 1: nat
    k8s-master: Adapter 2: hostonly
==> k8s-master: Forwarding ports...
    k8s-master: 22 (guest) => 2222 (host) (adapter 1)
==> k8s-master: Running 'pre-boot' VM customizations...
==> k8s-master: Booting VM...
==> k8s-master: Waiting for machine to boot. This may take a few minutes...
    k8s-master: SSH address: 127.0.0.1:2222
    k8s-master: SSH username: vagrant
    k8s-master: SSH auth method: private key
==> k8s-master: Machine booted and ready!
==> k8s-master: Checking for guest additions in VM...
    k8s-master: The guest additions on this VM do not match the installed version of
    k8s-master: VirtualBox! In most cases this is fine, but in rare cases it can
    k8s-master: prevent things such as shared folders from working properly. If you see
    k8s-master: shared folder errors, please make sure the guest additions within the
    k8s-master: virtual machine match the version of VirtualBox you have installed on
    k8s-master: your host and reload your VM.
    k8s-master:
    k8s-master: Guest Additions Version: 6.1.18
    k8s-master: VirtualBox Version: 6.0
==> k8s-master: Setting hostname...
==> k8s-master: Configuring and enabling network interfaces...
==> k8s-master: Mounting shared folders...
    k8s-master: /vagrant => /home/sergioib/Escritorio/Informatica/Vagrant/k8
==> k8s-master: Running provisioner: ansible...
Vagrant has automatically selected the compatibility mode '2.0'
according to the Ansible version installed (2.7.7).

Alternatively, the compatibility mode can be specified in your Vagrantfile:
https://www.vagrantup.com/docs/provisioning/ansible_common.html#compatibility_mode

    k8s-master: Running ansible-playbook...

PLAY [all] *********************************************************************

TASK [Gathering Facts] *********************************************************
ok: [k8s-master]

TASK [Instala los paquetes que permite usar APT con HTTPS] *********************
changed: [k8s-master]

TASK [Añade la clave apt para Docker] ******************************************
changed: [k8s-master]

TASK [Añade el repositorio apt de la versión estable] **************************
changed: [k8s-master]

TASK [Instala Docker y sus dependencias] ***************************************
changed: [k8s-master]

TASK [Añade al usuario vagrant al grupo de docker] *****************************
changed: [k8s-master]

TASK [Elimina el fichero swap de /etc/fstab] ***********************************
ok: [k8s-master] => (item=swap)
changed: [k8s-master] => (item=none)

TASK [Deshabilita el swap] *****************************************************
changed: [k8s-master]

TASK [Añade la clave apt para Kubernetes] **************************************
changed: [k8s-master]

TASK [Añade el repositorio apt para Kubernetes] ********************************
changed: [k8s-master]

TASK [Instala los binarios de Kubernetes] **************************************
changed: [k8s-master]

TASK [Configura el node ip] ****************************************************
changed: [k8s-master]

TASK [Reinicia kubelet] ********************************************************
changed: [k8s-master]

TASK [Reinicia Docker] *********************************************************
changed: [k8s-master]

TASK [Inicializa el cluster de Kubernetes usando kubeadm] **********************
changed: [k8s-master]

TASK [Organiza el kubeconfig del usuario vagrant] ******************************
changed: [k8s-master] => (item=mkdir -p /home/vagrant/.kube)
changed: [k8s-master] => (item=cp -i /etc/kubernetes/admin.conf /home/vagrant/.kube/config)
changed: [k8s-master] => (item=chown vagrant:vagrant /home/vagrant/.kube/config)
 [WARNING]: Consider using the file module with state=directory rather than
running mkdir.  If you need to use command because file is insufficient you can
add warn=False to this command task or set command_warnings=False in
ansible.cfg to get rid of this message.

 [WARNING]: Consider using the file module with owner rather than running
chown.  If you need to use command because file is insufficient you can add
warn=False to this command task or set command_warnings=False in ansible.cfg to
get rid of this message.


TASK [Instala el pod de red Calico] ********************************************
changed: [k8s-master]

TASK [Instala el pod de red Calico 2] ******************************************
changed: [k8s-master]

TASK [Genera el comando de join] ***********************************************
changed: [k8s-master]

TASK [Copia el comando de join a un fichero local] *****************************
changed: [k8s-master -> localhost]

RUNNING HANDLER [docker status] ************************************************
ok: [k8s-master]

PLAY RECAP *********************************************************************
k8s-master                 : ok=21   changed=19   unreachable=0    failed=0

==> node-1: Importing base box 'bento/ubuntu-16.04'...
==> node-1: Matching MAC address for NAT networking...
==> node-1: Checking if box 'bento/ubuntu-16.04' version '202102.02.0' is up to date...
==> node-1: Setting the name of the VM: k8_node-1_1615035591709_14063
==> node-1: Fixed port collision for 22 => 2222. Now on port 2200.
==> node-1: Clearing any previously set network interfaces...
==> node-1: Preparing network interfaces based on configuration...
    node-1: Adapter 1: nat
    node-1: Adapter 2: hostonly
==> node-1: Forwarding ports...
    node-1: 22 (guest) => 2200 (host) (adapter 1)
==> node-1: Running 'pre-boot' VM customizations...
==> node-1: Booting VM...
==> node-1: Waiting for machine to boot. This may take a few minutes...
    node-1: SSH address: 127.0.0.1:2200
    node-1: SSH username: vagrant
    node-1: SSH auth method: private key
==> node-1: Machine booted and ready!
==> node-1: Checking for guest additions in VM...
    node-1: The guest additions on this VM do not match the installed version of
    node-1: VirtualBox! In most cases this is fine, but in rare cases it can
    node-1: prevent things such as shared folders from working properly. If you see
    node-1: shared folder errors, please make sure the guest additions within the
    node-1: virtual machine match the version of VirtualBox you have installed on
    node-1: your host and reload your VM.
    node-1:
    node-1: Guest Additions Version: 6.1.18
    node-1: VirtualBox Version: 6.0
==> node-1: Setting hostname...
==> node-1: Configuring and enabling network interfaces...
==> node-1: Mounting shared folders...
    node-1: /vagrant => /home/sergioib/Escritorio/Informatica/Vagrant/k8
==> node-1: Running provisioner: ansible...
Vagrant has automatically selected the compatibility mode '2.0'
according to the Ansible version installed (2.7.7).

Alternatively, the compatibility mode can be specified in your Vagrantfile:
https://www.vagrantup.com/docs/provisioning/ansible_common.html#compatibility_mode

    node-1: Running ansible-playbook...

PLAY [all] *********************************************************************

TASK [Gathering Facts] *********************************************************
ok: [node-1]

TASK [Instala los paquetes que permite usar APT con HTTPS] *********************
changed: [node-1]

TASK [Añade la clave apt para Docker] ******************************************
changed: [node-1]

TASK [Añade el repositorio apt de la versión estable] **************************
changed: [node-1]

TASK [Instala Docker y sus dependencias] ***************************************
changed: [node-1]

TASK [Añade al usuario vagrant al grupo de Docker] *****************************
changed: [node-1]

TASK [Elimina el fichero de swap de /etc/fstab] ********************************
ok: [node-1] => (item=swap)
changed: [node-1] => (item=none)

TASK [Deshabilita el swap] *****************************************************
changed: [node-1]

TASK [Añade la clave apt para Kubernetes] **************************************
changed: [node-1]

TASK [Añade el repositorio apt para Kubernetes] ********************************
changed: [node-1]

TASK [Instala los binarios para Kubernetes] ************************************
changed: [node-1]

TASK [Configura node ip] *******************************************************
changed: [node-1]

TASK [Reinicia kubelet] ********************************************************
changed: [node-1]

TASK [Reinicia Docker] *********************************************************
changed: [node-1]

TASK [Copia el comando de join a la localización del server] *******************
changed: [node-1]

TASK [Une el nodo al clúster] **************************************************
changed: [node-1]

RUNNING HANDLER [docker status] ************************************************
ok: [node-1]

PLAY RECAP *********************************************************************
node-1                     : ok=17   changed=15   unreachable=0    failed=0

==> node-2: Importing base box 'bento/ubuntu-16.04'...
==> node-2: Matching MAC address for NAT networking...
==> node-2: Checking if box 'bento/ubuntu-16.04' version '202102.02.0' is up to date...
==> node-2: Setting the name of the VM: k8_node-2_1615035854760_61331
==> node-2: Fixed port collision for 22 => 2222. Now on port 2201.
==> node-2: Clearing any previously set network interfaces...
==> node-2: Preparing network interfaces based on configuration...
    node-2: Adapter 1: nat
    node-2: Adapter 2: hostonly
==> node-2: Forwarding ports...
    node-2: 22 (guest) => 2201 (host) (adapter 1)
==> node-2: Running 'pre-boot' VM customizations...
==> node-2: Booting VM...
==> node-2: Waiting for machine to boot. This may take a few minutes...
    node-2: SSH address: 127.0.0.1:2201
    node-2: SSH username: vagrant
    node-2: SSH auth method: private key
==> node-2: Machine booted and ready!
==> node-2: Checking for guest additions in VM...
    node-2: The guest additions on this VM do not match the installed version of
    node-2: VirtualBox! In most cases this is fine, but in rare cases it can
    node-2: prevent things such as shared folders from working properly. If you see
    node-2: shared folder errors, please make sure the guest additions within the
    node-2: virtual machine match the version of VirtualBox you have installed on
    node-2: your host and reload your VM.
    node-2:
    node-2: Guest Additions Version: 6.1.18
    node-2: VirtualBox Version: 6.0
==> node-2: Setting hostname...
==> node-2: Configuring and enabling network interfaces...
==> node-2: Mounting shared folders...
    node-2: /vagrant => /home/sergioib/Escritorio/Informatica/Vagrant/k8
==> node-2: Running provisioner: ansible...
Vagrant has automatically selected the compatibility mode '2.0'
according to the Ansible version installed (2.7.7).

Alternatively, the compatibility mode can be specified in your Vagrantfile:
https://www.vagrantup.com/docs/provisioning/ansible_common.html#compatibility_mode

    node-2: Running ansible-playbook...

PLAY [all] *********************************************************************

TASK [Gathering Facts] *********************************************************
ok: [node-2]

TASK [Instala los paquetes que permite usar APT con HTTPS] *********************
changed: [node-2]

TASK [Añade la clave apt para Docker] ******************************************
changed: [node-2]

TASK [Añade el repositorio apt de la versión estable] **************************
changed: [node-2]

TASK [Instala Docker y sus dependencias] ***************************************
changed: [node-2]

TASK [Añade al usuario vagrant al grupo de Docker] *****************************
changed: [node-2]

TASK [Elimina el fichero de swap de /etc/fstab] ********************************
ok: [node-2] => (item=swap)
changed: [node-2] => (item=none)

TASK [Deshabilita el swap] *****************************************************
changed: [node-2]

TASK [Añade la clave apt para Kubernetes] **************************************
changed: [node-2]

TASK [Añade el repositorio apt para Kubernetes] ********************************
changed: [node-2]

TASK [Instala los binarios para Kubernetes] ************************************
changed: [node-2]

TASK [Configura node ip] *******************************************************
changed: [node-2]

TASK [Reinicia kubelet] ********************************************************
changed: [node-2]

TASK [Reinicia Docker] *********************************************************
changed: [node-2]

TASK [Copia el comando de join a la localización del server] *******************
changed: [node-2]

TASK [Une el nodo al clúster] **************************************************
changed: [node-2]

RUNNING HANDLER [docker status] ************************************************
ok: [node-2]

PLAY RECAP *********************************************************************
node-2                     : ok=17   changed=15   unreachable=0    failed=0
Accedemos a nuestra maquina master para comprobar que a este se le han unido los dos nodos si el despliegue a ido correctamente.
vagrant@k8s-master:~$ kubectl get nodes
NAME         STATUS     ROLES                  AGE   VERSION
k8s-master   Ready      control-plane,master   19m   v1.20.4
node-1       NotReady   <none>                 15m   v1.20.4
node-2       NotReady   <none>                 10m   v1.20.4
Para poder acceder desde nuestra maquina en lugar de desde nuestro master, copiamos el contenido de .kube/config y lo copiamos en el .kube/config en nuestra maquina anfitriona y comprobamos que podemos ejecutar los comandos en nuestra maquina.
sergioib@debian-sergio:~$ kubectl get nodes
NAME         STATUS   ROLES                  AGE   VERSION
k8s-master   Ready    control-plane,master   26m   v1.20.4
node-1       Ready    <none>                 22m   v1.20.4
node-2       Ready    <none>                 17m   v1.20.4
Copiamos los ficheros donde tenemos los ficheros para el despliegue de letschat en nuestro directorio kubernetes-setup y los añadimos al escenario de la siguiente forma:
sergioib@debian-sergio:~/Escritorio/Informatica/Vagrant/k8/kubernetes-setup$ kubectl create -f mongo-deployment.yaml
deployment.apps/mongo created
sergioib@debian-sergio:~/Escritorio/Informatica/Vagrant/k8/kubernetes-setup$ kubectl create -f mongo-srv.yaml
service/mongo created
sergioib@debian-sergio:~/Escritorio/Informatica/Vagrant/k8/kubernetes-setup$ kubectl create -f letschat-deployment.yaml
deployment.apps/letschat created
sergioib@debian-sergio:~/Escritorio/Informatica/Vagrant/k8/kubernetes-setup$ kubectl create -f letschat-srv.yaml
service/letschat created
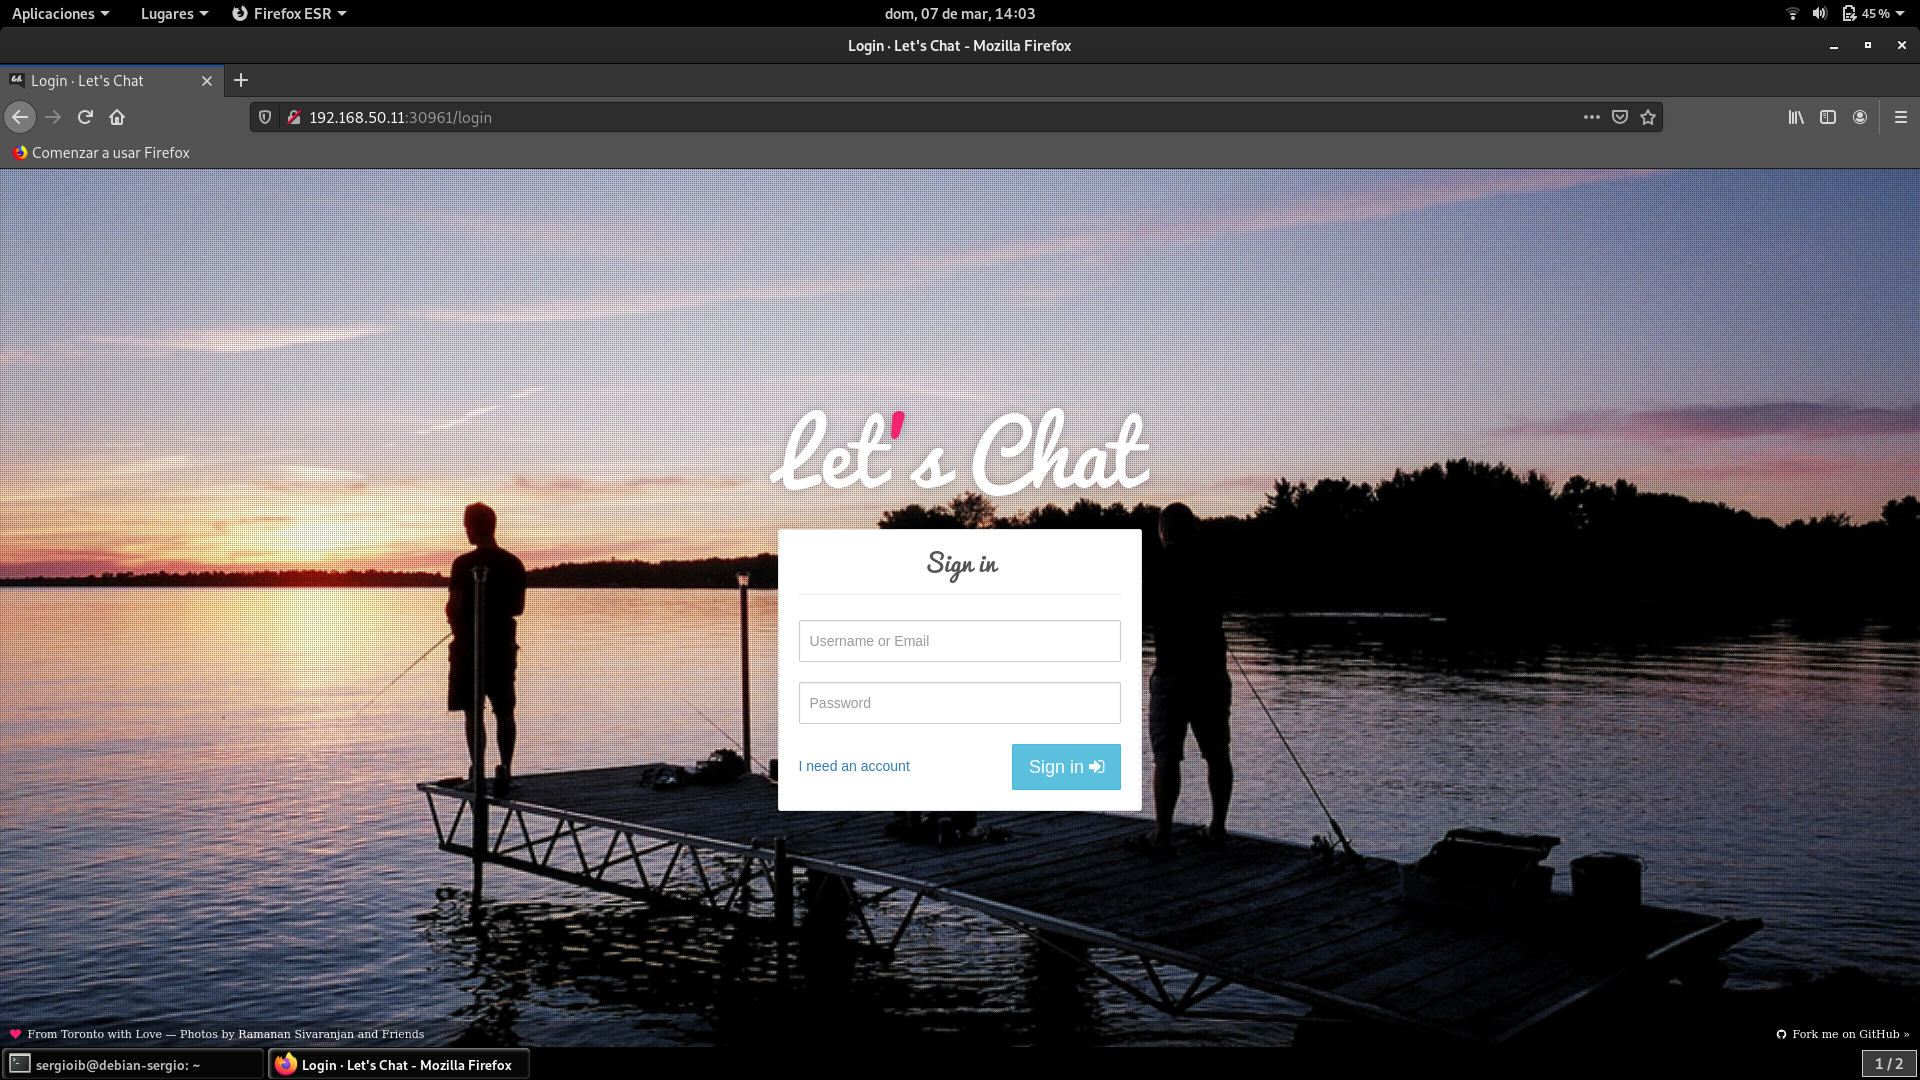
Comprobamos que funcione, para ello ejecutamos o bien un kubectl get service o bien un kubectl get all para saber en que puerto se esta ejecutando nuestro letschat y una vez sepamos el puerto comprobamos que se esta ejecutando en el navegador.
sergioib@debian-sergio:~$ kubectl get service
NAME         TYPE        CLUSTER-IP      EXTERNAL-IP   PORT(S)          AGE
kubernetes   ClusterIP   10.96.0.1       <none>        443/TCP          26h
letschat     NodePort    10.99.77.113    <none>        8080:30961/TCP   25h
mongo        ClusterIP   10.103.65.204   <none>        27017/TCP        26h

sergioib@debian-sergio:~$ kubectl get all
NAME                            READY   STATUS   RESTARTS   AGE
pod/letschat-7c66bd64f5-w2frt   0/1     Error    19         26h
pod/mongo-5c694c878b-flgcg      0/1     Error    10         26h

NAME                 TYPE        CLUSTER-IP      EXTERNAL-IP   PORT(S)          AGE
service/kubernetes   ClusterIP   10.96.0.1       <none>        443/TCP          26h
service/letschat     NodePort    10.99.77.113    <none>        8080:30961/TCP   25h
service/mongo        ClusterIP   10.103.65.204   <none>        27017/TCP        26h

NAME                       READY   UP-TO-DATE   AVAILABLE   AGE
deployment.apps/letschat   1/1     1            1           26h
deployment.apps/mongo      1/1     1            1           26h

NAME                                  DESIRED   CURRENT   READY   AGE
replicaset.apps/letschat-7c66bd64f5   1         1         1       26h
replicaset.apps/mongo-5c694c878b      1         1         1       26h
Una vez que se haya comprobado que funcione, probamos a escalar varias replicas de la siguiente forma:
sergioib@debian-sergio:~$ kubectl scale --replicas=3 deploy/letschat
deployment.apps/letschat scaled
Comprobamos que se hayan creado dos pods nuevos:
sergioib@debian-sergio:~$ kubectl get pod -o wide
NAME                        READY   STATUS    RESTARTS   AGE   IP               NODE     NOMINATED NODE   READINESS GATES
letschat-7c66bd64f5-75kjv   1/1     Running   2          46m   192.168.84.147   node-1   <none>           <none>
letschat-7c66bd64f5-zbbn7   1/1     Running   7          46m   192.168.247.23   node-2   <none>           <none>
letschat-7c66bd64f5-zc5k7   1/1     Running   1          20m   192.168.247.22   node-2   <none>           <none>
mongo-5c694c878b-flgcg      1/1     Running   14         27h   192.168.84.148   node-1   <none>           <none>
Como se puede ver se ha creado un nuevo pod. al indicar que haya 3 replicas como en este ejemplo, en el caso de eliminar una de las replicas se creara otro de forma automática. En el caso de tener varias replicas activadas, al hacer una desescalada el nodo que permanecerá sera el de mayor antigüedad.
Conclusión
Has creado tu primer clúster de Kubernetes local y desplegado una aplicación real. En el proceso, aprendiste:
-
Qué es un clúster, nodo, pod, deployment y service.
-
Cómo usar Ansible para automatizar la instalación de Kubernetes.
-
Cómo desplegar, escalar y exponer una aplicación.
Esto sienta una base sólida para avanzar hacia temas más avanzados como:
-
Helm (gestor de paquetes para Kubernetes)
-
Ingress (rutas HTTP internas/externas)
-
Volúmenes persistentes y almacenamiento
-
Monitorización con Prometheus y Grafana